Leather repair for car seats is the process of restoring scuffs, cracks, tears, and faded color on automotive leather so it looks and feels close to factory fresh. This leather repair for car seats guide explains DIY steps and pro methods, when to call a technician in Unit #3, and how to maintain results long-term.
By sajid tarwal
| Last updated: June 30, 2026
Above-the-Fold Overview & TOC
Use this guide to quickly assess leather damage, choose the right repair method, and execute clean, durable fixes. We outline exact steps for cleaning, filling, color matching, and protecting seats, plus pro tips from Prime Auto Wash’s certified team that serves Unit #3 and the greater Mississauga area.
Leather ages from friction, UV, and spills. A structured approach prevents over-sanding, mismatched dyes, and peeling. In a few minutes, you’ll know which issues are DIY-friendly and which ones are best left to a certified interior specialist.
- What leather repair means (and why it fails when rushed)
- How to diagnose: scuffs, cracks, tears, punctures, color loss
- Step-by-step fixes with repair times (10–60 minutes per stage)
- Color matching, texture replication, and factory-matched sheen
- Maintenance cadence: clean every 2–4 weeks; condition every 2–3 months
- When to call Prime Auto Wash’s mobile team for on-site restoration
What Is Leather Repair for Car Seats?
Automotive leather repair restores damage—abrasions, surface cracks, small tears, punctures, and faded dye—using cleaners, fillers, patches, colorants, and topcoats. The goal is structural stability and a seamless finish that matches factory color, texture, and sheen without replacing the seat.
At its core, repair blends materials science and technique. Good outcomes rely on clean substrates, thin filler layers (often 2–4 passes at 0.2–0.4 mm), accurate color, and controlled curing (5–15 minutes per layer with gentle heat). Skipping surface prep is the main cause of early failure within the first 30–60 days.
- Common damage types: scuffs under 1 inch, wear cracks along bolster edges, pet scratches, belt-buckle rubs, and punctures from keys (2–5 mm).
- Repair objectives: stabilize leather fibers, rebuild missing material, re-create grain, and lock in color with a protective topcoat.
- Professional touch: Prime Auto Wash technicians use controlled heat (110–140°F range) and grain-matching stamps to reproduce OEM textures on Mississauga vehicles.
Why Leather Repair Matters (Comfort, Value, and Safety)
Repairing leather early prevents cracks from spreading, maintains seating comfort, and preserves resale value. Minor fixes take under an hour, while unchecked wear can require large patches or reupholstery. Quick action reduces material loss and keeps surfaces hygienic and easy to sanitize.
Leather is porous. Dirt embeds in microfractures and accelerates wear. Once a crack passes 10–12 mm, edges curl and harden, making blending harder and increasing repair time by 30–50%. Clean, conditioned seats also help cabins stay sanitary, especially for rideshare and family vehicles.
- Value retention: Interior condition can sway resale appraisals by noticeable margins. A well-kept cabin signals overall care.
- Comfort: Flattened foam and dry leather increase driver fatigue on 30–60 minute commutes. Repaired bolsters keep shape and support.
- Hygiene: Smooth, sealed surfaces resist spills and can be disinfected in minutes using approved interior products.
- Local reality: In Unit #3, winter jackets and salt increase abrasion; summer UV fades color. Seasonal swings add up to hundreds of sit/slide cycles each month.
Prime Auto Wash’s in-shop environment or mobile unit provides stable lighting and temperature, improving color accuracy and cure times. That control shaves minutes off each layer and reduces rework.
How Leather Repair Works (From Prep to Topcoat)
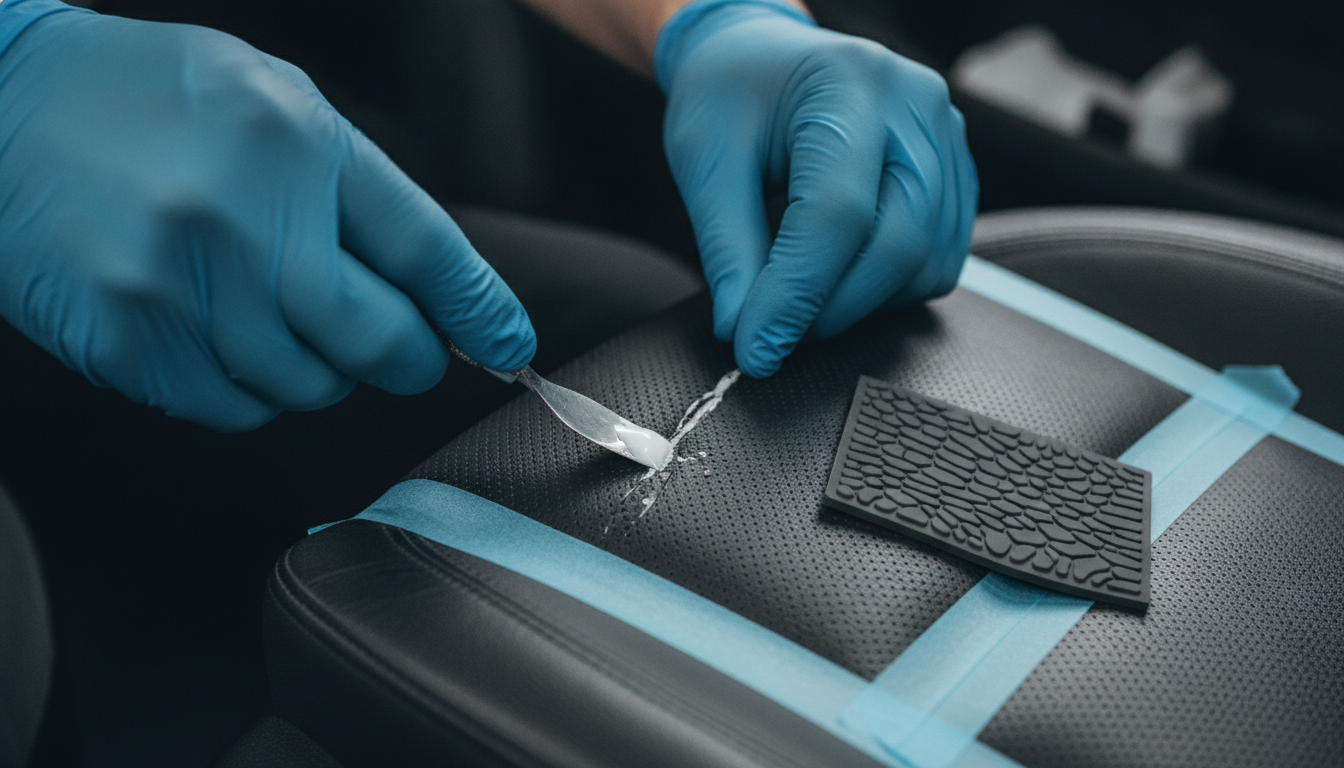
Effective leather repair follows a strict sequence: deep clean, mask, sand, fill in thin layers, texture, color match, and protect with a topcoat. Each pass is light and measured, curing 5–15 minutes before the next, to prevent ridges, bubbles, or premature peeling.
Every step builds the foundation for the next. Aim for light pressure, even passes, and plenty of drying time. Thin coats outlast thick ones, especially on high-wear zones like driver bolsters that see 20–40 entries per day.
- Inspection (3–5 minutes): Measure crack length and depth; check perforations; test dye transfer with a white cloth.
- Cleaning (5–10 minutes): Use pH-balanced leather cleaner and a soft brush. Avoid soaking; 15–20 light passes are better than 2 heavy ones.
- Masking (2–3 minutes): Low-tack tape defines the work area by 2–4 mm to protect surrounding grain.
- Light sanding (3–5 minutes): 600–800 grit to degloss and feather edges; vacuum dust.
- Fill & texture (10–25 minutes): Apply leather filler in 2–4 ultra-thin layers; imprint grain using a texture pad while tacky.
- Color match (10–20 minutes): Mix dye in daylight LEDs (5000–6500K). Test on a hidden area first.
- Topcoat & cure (10–15 minutes): Apply matte/satin/gloss to match OEM sheen. Gentle heat helps crosslink without glossing out.
Prime Auto Wash’s certified detailers use controlled-air sprayers for even dye distribution and measure gloss units to maintain a uniform finish seat-to-seat.
Types of Leather Damage and the Right Fix
Match the repair to the damage: scuffs get color; shallow cracks need filler; tears require patching; perforated panels demand extra masking. Choosing the correct method up front saves 30–60 minutes and prevents visible halos or mismatched textures.
Quick diagnosis checklist
- Scuffs (≤25 mm): Color-only repair after cleaning and light sanding.
- Surface cracks (≤50 mm, shallow): Thin filler layers; re-create grain; dye and topcoat.
- Deep cracks (over 50 mm or frayed): Backing patch plus filler to bridge.
- Tears (10–80 mm): Use subpatch (fabric/leather) glued beneath; feather edges; build filler flush.
- Punctures (2–6 mm): Round edges, reinforce with micro-patch; minimal filler to avoid doming.
- Perforated panels: Mask holes to stop filler bleed; apply color with a micro-brush.
When DIY is fine vs. when to call a pro
- DIY-friendly: Small scuffs, light color rub, hairline cracks on non-perforated areas.
- Call Prime Auto Wash: Tears crossing seams, large color loss (palm-size or bigger), or any repair on ventilated/perforated seats.
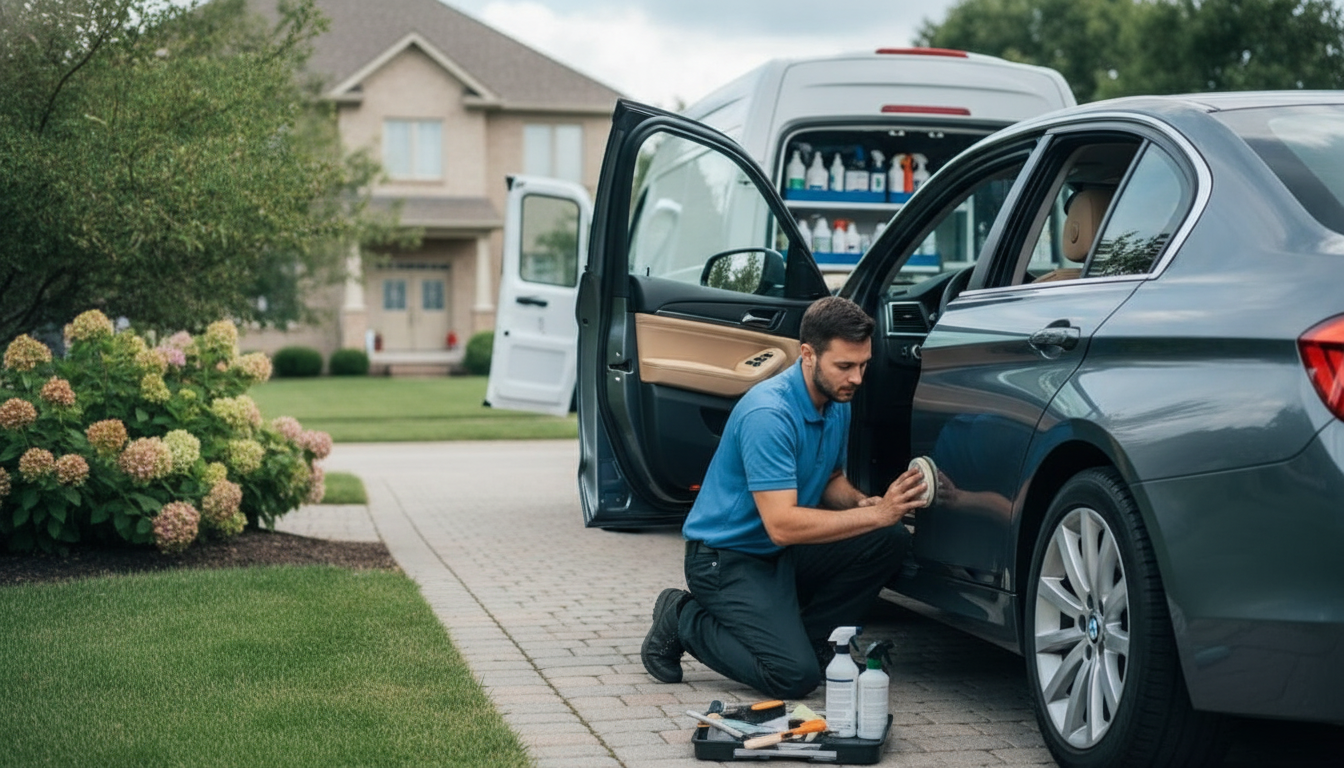
- Mobile option: Our self-contained unit handles power, water, and extraction at your driveway or office, minimizing downtime on busy weekdays.
Complex seam repairs and ventilated seats are best handled in a controlled shop where airflow and temperature are stable, especially during multi-layer dye work.
Step-by-Step DIY Repair (Prime Auto Wash Method)
For small scuffs and shallow cracks, clean, sand lightly, apply thin filler, re-create grain, color match, and topcoat. Work in thin layers with 5–10 minute cures, keep edges feathered, and stop if dye build-up forms ridges—those signal it’s time to consult a pro.
Tools you’ll need
- pH-balanced leather cleaner and soft brush
- 600–800 grit sandpaper, microfiber towels
- Leather filler, palette knife, heat gun or hair dryer
- Grain pad or texture stamp, low-tack masking tape
- Leather dye (matte/satin/gloss mixes), small spray gun or sponge
- Protective topcoat and nitrile gloves
DIY procedure (approx. 45–75 minutes)
- Prep: Vacuum the seat. Wipe with cleaner (10–15 passes). Let dry 2–3 minutes.
- Degloss: Very light 600–800 grit sanding over 30–45 seconds; wipe dust.
- Mask: Tape a 2–3 mm border to guard surrounding grain.
- Fill: Apply a pea-sized amount of filler; spread paper-thin. Cure 5–8 minutes with warm air. Repeat 2–3 times until level.
- Texture: Press a grain pad lightly while the final layer is tacky (5–10 seconds).
- Color test: Mix dye; test on an inconspicuous area. Adjust with small additions of black/white to fine-tune hue and value.
- Apply color: 2–3 thin coats, 6–10 inches away if spraying. Dry 5 minutes between coats.
- Topcoat: Match sheen (matte/satin/gloss). Two light passes protect against dye transfer.
Need backup? Our Interior Detailing service can take over mid-project, finish color blending, and lock in durability with pro-grade coatings.
Color Matching and Texture Blending (OEM-Look Results)
Accurate color comes from mixing to the seat, not the code, and testing under neutral lighting. Texture is recreated with grain pads pressed into semi-cured filler. Matching sheen with the right topcoat is the final step that makes repairs disappear.
Most OEM codes get you 80–90% close. Final 10–20% happens at the seat using small increments—1–2 drops of black deepens, white raises value, and a hint of yellow warms tan. Under neutral 5000–6500K LEDs, metamerism (color shift) is minimized.
- Gloss control: Matte is 10–20 gloss units, satin 30–45, gloss 60+. Measure nearby panels to match.
- Texture: Use the closest grain pad and vary pressure 10–20% across the area for organic patterning.
- Edge blending: Keep the color halo small (3–8 mm) to avoid a visible ring in bright daylight.
Our team often blends dyes seat-wide for uniformity when bolsters are sun-faded, ensuring consistent tone across panels.
Maintenance & Prevention (Keep Results Longer)
Clean gently every 2–4 weeks and condition every 2–3 months. Use seat guards like towels during gym trips, and limit direct sun. Small habits reduce friction cycles by the hundreds each month, prolonging repairs and delaying future work.
- Cleaning cadence: Light brush + microfiber wipe takes 3–5 minutes per seat and removes grit that acts like 800–1000 grit sandpaper.
- Conditioning: Thin applications prevent pore clogging. Over-conditioning every week can soften topcoats prematurely.
- UV care: Park in shade when possible; rotate 90° sunshades; aim for 10–15°F cooler cabin temps.
- Load management: Avoid pocket items with keys and clips; these create 2–6 mm punctures.
For busy weeks, book a quick refresh with our Interior Detailing Pro package or plan seasonal upkeep with mobile car detailing at home or office.
Local considerations for Unit #3
- Winter salt near Westacres Park parking areas accelerates abrasion; carry a small towel to cover bolsters after skating or workouts.
- Summer sun near the Mississauga Chinese Centre open lots can spike cabin temps; vent for 2–3 minutes before sitting to cut friction on hot leather.
- Rideshare runs in Unit #3? Keep a quick-clean kit in the trunk (brush, microfiber, pH cleaner) to address spills within 5–10 minutes.
Tools, Materials, and Resources
Success comes from the right consumables used sparingly: pH-safe cleaners, fine grits, flexible fillers, OEM-tuned colorants, and matching topcoats. A low-heat gun, grain pads, and neutral lighting complete a reliable home kit for small leather fixes.
- Cleaners: pH-balanced formulas maintain the protective top layer. Avoid harsh solvents.
- Abrasives: 600–800 grit for deglossing; 1000+ for final feathering.
- Fillers: Flexible leather compounds that tolerate temperature swings (−10°F to 140°F).
- Colorants: Waterborne leather dyes with adjustable sheen; small spray guns atomize best at 12–18 PSI.
- Topcoats: Matte, satin, or gloss—match nearby panels for invisibility.
- Lighting: 5000–6500K daylight LEDs minimize color shift between garage and outdoors.
For background on leather cleaning principles and conditioning intervals, see this general overview of leather cleaning and conditioning. For broader automotive care context, browse these car repair topics and their repair services category for cross-discipline maintenance ideas.
Case Studies and Real-World Examples
Real outcomes depend on prep, thin layers, and matching sheen. Here are condensed scenarios from our Mississauga workflow—each shows the decision point where DIY stops and professional methods take over for lasting, factory-like results.
1) Driver bolster crack (40 mm) — DIY success
- Symptoms: Dry, light-colored line on outer bolster; no fabric exposed.
- Actions: Cleaned, deglossed, two filler layers, satin dye in three coats, satin topcoat.
- Time: ~55 minutes; ready to sit after 30 more minutes of air cure.
- Result: 90–95% invisible at 2–3 feet; zero dye transfer after 24 hours.
2) Perforated seat crack (25 mm) — pro-only
- Symptoms: Hairline running through perforations; risk of filler bleed.
- Actions: Our shop masked perforations individually, used micro-brush dye, and controlled airflow to prevent bridging.
- Time: Multi-step over ~2 hours in a controlled bay.
- Result: Even tone, restored ventilation, and clean perforation holes.
3) Key puncture (5 mm) — hybrid approach
- Symptoms: Small hole near seat base.
- Actions: We installed a subpatch for strength; owner handled final conditioning two weeks later.
- Time: ~70 minutes; full strength after 24-hour cure.
- Result: Durable, smooth feel without doming around the repair.
4) Sun-faded panel — color re-blend
- Symptoms: Upper backrest faded 10–15% lighter than bottom cushion.
- Actions: Seat-wide blend; measured gloss; applied satin topcoat to match adjacent panel at ~35 gloss units.
- Result: Uniform look across panels in daylight and garage lighting.
5) Rideshare deep clean before dye
- Scenario: Uber vehicle with weekly spills and sanitizer residue.
- Actions: Full interior prep with steam, extractor on carpets, then leather reconditioning to stabilize before any dye work.
- Next step: Owner scheduled Showroom Detailing Pro to synchronize interior and exterior refresh for resale photos.
Common Mistakes to Avoid (And How to Fix Them)
The top mistakes are thick filler layers, rushing cure times, skipping masking on perforations, and ignoring sheen. Fix them by working thinner, waiting 5–15 minutes per layer, masking carefully, and measuring gloss units before topcoating.
- Overfilling: Causes ridges and early cracking. Sand back with 1000 grit and rebuild in micro-layers.
- Heat blasting: Warps texture. Keep gun 6–10 inches away; move continuously.
- No masking: Filler in perforations blocks ventilation. Use hole masks or micro-tape strips.
- Color guesswork: Always test swatches on hidden areas under neutral light.
- Skipping topcoat: Dye transfer shows up on light clothes within 1–2 drives.
When in doubt, pause and consult the pros. Our leather seat care article explains long-term conditioning and friction reduction strategies.
DIY vs. Professional: Which Route Is Better?
DIY is great for tiny scuffs and shallow cracks. Professional service wins for seams, perforations, large color loss, or when you want seat-wide blending and warranty-backed results. Time, tools, and finish expectations decide the best route.
| Situation | DIY | Professional (Prime Auto Wash) |
|---|---|---|
| Scuff ≤25 mm, non-perforated | Clean + color touch-up in ~45–60 minutes | Fast blend with pro sprayer; perfect sheen match |
| Hairline crack ≤50 mm | 2–3 thin filler layers + dye | Grain replication for seamless texture |
| Perforated/ventilated panel | Risk of bleed and blocked holes | Micro-masking + controlled airflow |
| Tear across seam | Not recommended | Subpatch + stitching-safe rebuild |
| Seat-wide sun fade | Hard to keep even | Color blend with measured gloss units |
Want a second opinion? Explore our resale value guide or message us to evaluate your seat via quick photos.
How Leather Repair Fits Into Full Interior Detailing
Leather repair isn’t a standalone fix. It fits inside full interior prep: debris removal, fabric extraction, surface sanitation, and then targeted leather restoration. This sequence prevents contamination under filler and ensures dye adhesion.
In our workflow, leather work happens after vacuuming, steam, and stain extraction. That removes residues that would otherwise interfere with adhesion and sheen. When needed, we pair leather work with odor removal and plastic restoration for a cohesive look.
- Pair with seat stain removal before color blending.
- Finish with odor elimination if smoke is present.
- Consider exterior plastic restoration for a matching exterior refresh.
Need Help? On-Site or In-Shop Service
If your seat has a tear, seam split, or perforated crack, book Prime Auto Wash. Our mobile unit brings power, water, steam, and lighting to your driveway, or visit our Mississauga shop for controlled-bay restoration.
Soft CTA: Share two photos (close and wide) and the seat year/make/model. We’ll reply with a recommended plan and timeline—mobile at your home or office in Unit #3, or in-shop for complex work.
Request a mobile appointment or see our Interior Detailing packages.
Frequently Asked Questions
These quick answers address the most common DIY and service questions. Each response is actionable and designed for fast scanning, so you can decide whether to handle a fix yourself or call our certified team.
How long do small leather repairs last?
With proper prep and a matching topcoat, small scuff or crack repairs often hold up for many months of daily driving. Cleaning every 2–4 weeks and conditioning every few months helps preserve flexibility and prevents new micro-cracking.
Can I repair perforated or ventilated leather at home?
It’s risky. Filler can bleed into holes, block airflow, and leave a visible film. Perforated repairs require micro-masking and careful airflow control, which is why we recommend shop service for a clean, breathable result.
What if my color match looks right in the garage but wrong outside?
That’s metamerism—colors shift under different lighting. Mix and test under neutral 5000–6500K LEDs and then check in daylight. Adjust hue and sheen slightly, then re-blend the edges with thin coats for a seamless look.
When should I stop a DIY attempt and call a pro?
Stop if you see filler doming, color ridges, or any damage crossing a seam or perforation. Also call if color loss is palm-sized or larger. A certified tech can stabilize the area, re-texture, and blend the seat so the repair disappears.
Key Takeaways
Thin layers, patient curing, and correct sheen turn small flaws invisible. DIY stops at scuffs and shallow cracks; pros handle seams, perforations, and large fades. Maintain with gentle cleaning every few weeks and conditioning every season for lasting comfort.
- Prep thoroughly; thin coats cure stronger than thick ones.
- Color match under neutral light; keep halos to 3–8 mm.
- Topcoat to lock in dye and prevent transfer.
- Call Prime Auto Wash for seam, perforated, or large-area repairs.
Related Care Topics from Our Car Cluster
Leather repair pairs well with stain removal, odor neutralization, and full interior resets. Explore these connected topics to build a complete interior care routine around your schedule and driving habits.
For a deeper interior reset, see our guidance on cleaning car seats and how professional detailing supports resale value. If you prefer us to come to you, our mobile detailing overview breaks down what to expect.