Interior car cleaning deep clean checklist refers to a structured, step-by-step process for sanitizing, deodorizing, and restoring every surface in your cabin. It covers debris removal, fabric extraction, leather care, vents, glass, and protection. For Unit #3 drivers, a seasonal deep clean helps beat winter salt, allergens, and everyday mess while protecting resale value.
By Prime Auto Wash • Last updated: 2026-07-04
Quick Summary
Use this interior car deep clean checklist to work top-to-bottom: declutter, vacuum (crevices first), blow out vents, pre-treat stains, extract fabrics, clean leather and plastics, sanitize touchpoints, finish glass, and add UV protection. Plan 2–4 hours, ventilate well, and use the right pH-safe products for each material.
This complete guide blends professional detailing methods with home-friendly steps. You’ll learn exactly what a deep clean includes, why it matters for health and value, the tools to stock, and the right order of operations. We compare methods (steam vs extractor), share local Unit #3 tips, and include a printable checklist and FAQs.
- What a deep clean includes (and what it doesn’t)
- Tools to stock (HEPA vacuum, brushes, extractor, steam)
- Exact order of operations (25 steps you can follow today)
- Methods compared: steam vs hot-water extraction vs ozone
- Local considerations for Unit #3 drivers
- What is an interior deep clean?
- Why deep cleaning your cabin matters
- 25-step deep clean checklist
- Tools and supplies to use
- Steam vs extractor vs ozone
- Best practices and pro tips
- Buying guide for safer chemicals
- Real examples from Unit #3
- Plan your deep clean locally
- Printable checklist
- FAQ
What Is an Interior Car Deep Clean?
An interior car deep clean is a thorough, methodical treatment that removes embedded dirt, stains, allergens, odors, and residue from every cabin surface. It goes beyond a wipe-down by extracting fabrics, detailing crevices, sanitizing touchpoints, and adding protective dressings, leaving your interior hygienic, fresh-smelling, and easier to keep clean.
A deep service targets soil you can’t reach during quick washes. Expect seat rails, seatbelts, door jambs, pedals, cupholders, and vents to be addressed. Fabrics get pre-treated and extracted; leather gets pH-balanced cleaning and conditioning; plastics receive UV protection. Done right, re-soiling slows, and surfaces feel clean to the touch.
At Prime Auto Wash, this work sits at the core of our Full Interior Detailing. Our mobile unit brings steam, hot-water extraction, and HEPA vacuuming to your driveway or office, so you get dealership-level results without leaving home.
Why Deep Cleaning Your Interior Matters
Deep interior cleaning improves health, comfort, and resale value. By removing allergens, food residue, and grime from high-touch areas, you cut odors and reduce bacteria. Clean, conditioned materials last longer, and documented upkeep signals care to buyers, helping preserve trade-in appeal.
Cabin air holds dust, pollen, and pet dander. HEPA-focused vacuuming and fabric extraction capture fine particles and reduce irritants for passengers. Touchpoints like the steering wheel and shifter get handled over and over; sanitizing these areas helps minimize cross-contamination, especially for rideshare vehicles that see frequent occupants.
If odors linger (smoke, spills, pets), source removal plus enzyme treatments and a brief, unoccupied ozone cycle can restore neutral smell. For lingering smoke, see our tips in remove cigarette smell in a car to understand cause-and-effect and what to tackle first.
Step-by-Step Interior Car Cleaning Deep Clean Checklist
Work top-to-bottom and dry-to-wet. Declutter, blow out cracks, vacuum thoroughly, pre-treat stains, agitate, extract, and sanitize. Clean leather and plastics with pH-appropriate products, finish streak-free glass, and protect with UV-safe dressings. Allow fabrics to dry 4–6 hours with airflow before reloading mats or child seats.
- Open all doors; park in shade; set fans to circulate.
- Declutter everything, including under seats and door pockets.
- Remove floor mats; pre-rinse rubber mats outside.
- Blow out seams/vents with compressed air or soft brush.
- Vacuum from top surfaces down; use crevice tools first.
- Brush-vacuum pedals, seat rails, and tight tracks.
- Inspect stains; note fabric type (cloth/leather/vinyl/Alcantara).
- Test cleaners on an inconspicuous spot (30–60 seconds).
- Pre-treat stains with enzyme/APC; give 3–5 minutes dwell.
- Agitate with soft/medium brushes in short, controlled strokes.
- Hot-water extract cloth seats and carpets in overlapping passes.
- Blot excess moisture with microfiber; repeat if wicking occurs.
- Steam detail sticky plastics and cupholders where extraction isn’t ideal.
- Clean leather with pH-balanced product; wipe dry.
- Condition leather lightly; allow 10–15 minutes to absorb.
- Clean headliner with minimal moisture and gentle strokes.
- Disinfect high-touch areas (wheel, shifter, handles, screens—screen-safe).
- Detail vents with swabs/brushes; run HVAC on outside air 5 minutes.
- Clean interior glass with two-towel method; avoid ammonia on tint.
- Dress plastics/vinyl with UV-protectant (satin, not greasy).
- Deodorize with enzyme or brief ozone (no occupants present).
- Deep clean rubber mats; dry them before reinstalling.
- Final vacuum; brush carpet pile for uniform finish.
- Air-dry 4–6 hours; crack windows 1 inch.
- Reinstall seats/mats/child seats once fully dry and secure.
Need help choosing the right approach for fabric seats? Our walkthrough on how to clean car seats shows the difference between spot cleaning, foam, steam, and full extraction—plus when each one shines.
Tools and Supplies You’ll Need
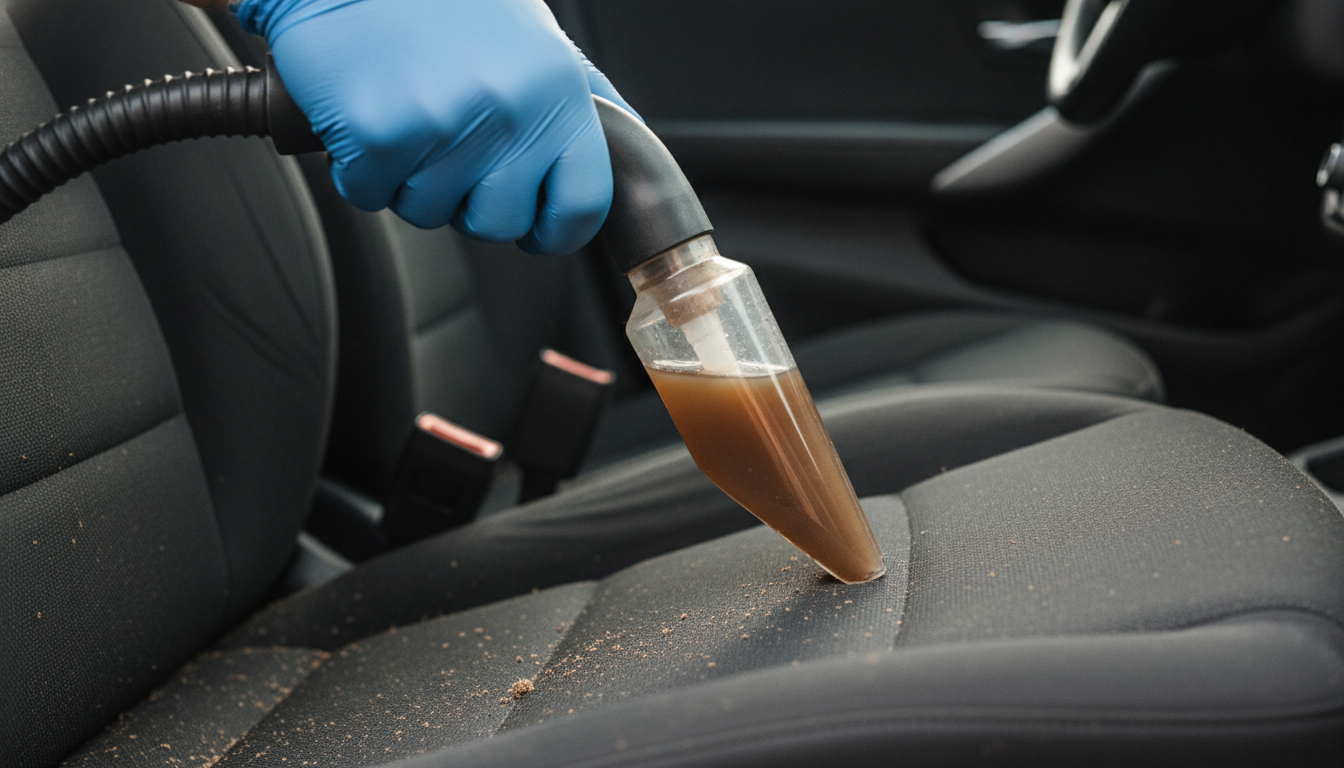
For pro-level results, use a HEPA vacuum (good suction and crevice tools), interior brushes, pH-appropriate cleaners, a steam cleaner or extractor for fabrics, enzyme odor removers, glass cleaner, and UV-safe dressings. Quality microfiber (300–400 GSM) prevents marring and speeds up drying and buffing.
- Vacuum with HEPA filter: Look for strong suction and sealed filtration to capture fine dust.
- Detail brushes: Soft for vents/switches; medium for fabrics and textured plastics.
- All-purpose cleaner (APC): Dilute 1:10–1:20 for interior plastics; always rinse.
- Enzyme/oxygen cleaner: Targets organic stains (spills, milk, food) and helps deodorize.
- Dedicated leather cleaner + conditioner: pH-balanced, non-greasy finish for grip and longevity.
- Steam cleaner: Great for sticky crevices and light sanitizing with minimal water.
- Hot-water extractor: Pulls embedded soil from carpets and cloth seats; speeds drying with proper technique.
- Ozone generator (optional): For stubborn odors after source removal, run in an empty cabin only.
- Glass cleaner: Ammonia-free for tints and safe on infotainment screens.
- UV protectant: Non-greasy, satin finish to reduce glare while preventing fading/cracking.
- Microfiber towels: 20–30 pieces; 300–400 GSM; color-code to avoid cross-contamination.
- PPE: Nitrile gloves and eye protection when using concentrates or steam.
For a deeper dive into the “dry-to-wet” order used in many industries, see general deep-cleaning checklists like this commercial equipment checklist and this kitchen deep clean guide that echo similar sequencing principles.
Methods Compared: Steam, Extractor, Ozone, and More
Steam excels at sanitizing and stuck-on grime with minimal moisture. Hot-water extraction removes embedded soil from fabrics. Ozone neutralizes odors at a molecular level but requires strict safety. Pair these with targeted brushes and pH-appropriate cleaners for a complete, material-safe approach.
| Method | Best For | Advantages | Limitations |
|---|---|---|---|
| Steam | Crevices, plastics, light fabric refresh | Low water, sanitizes, lifts sticky residue | Not ideal for heavy fabric soils; watch heat on delicate trim |
| Hot-water extraction | Carpets, cloth seats, winter salt | Deep soil removal, rinse + recover | Dry time 4–6 hours; poor technique can overwet |
| Enzyme/Oxidizing cleaners | Food, milk, pet accidents | Targets organics; reduces odor sources | Needs dwell time; always test for colorfastness |
| Ozone | Persistent smoke/mildew odors | Neutralizes volatile compounds | Run only in empty car; ventilate thoroughly afterward |
We often use multiple methods. Example: for a milk spill, we’ll pre-treat with enzyme, agitate, hot-water extract, and then, only if needed, run a short ozone cycle once the cabin is clean and dry. For more odor insights, check our quick explainer on cigarette odor removal.
Best Practices and Pro Tips
Test, then treat. Always test chemicals on hidden spots, use minimal moisture on headliners, and work in small sections. Agitate, then extract or wipe. Finish with UV-safe dressings and streak-free glass. Document before/after photos to monitor wear and preserve resale appeal.
- Leather: Use pH-balanced cleaner; avoid shiny dressings that cause slip. See our leather seat care guide for conditioning cadence.
- Fabric: Short, overlapping extractor passes; resist over-wetting to avoid wicking and long dry times.
- Pet hair: Start with a rubber brush or pumice on carpet, then vacuum; finish with a sticky roller in seams.
- Winter salt: Dissolve with a 1:10 vinegar-water pre-spray, agitate, then extract until rinse runs clear.
- Child seats: Remove and clean per manufacturer rules; reinstall securely and verify anchors.
- HVAC: Replace cabin filters on schedule; run AC on fresh air post-clean to purge dust.
- Odors: Treat sources first; ozone only after surfaces are clean and completely dry.
Curious how pro detailing stacks up against DIY? Our perspective in professional detailing vs DIY outlines when home methods are enough and where pro gear (steam, extractors, ozone) saves time and reduces risk.
Buying Guide: Safer Interior Chemicals and Tools
Choose pH-appropriate cleaners for the surface, avoid ammonia on tinted glass, and select microfiber in the 300–400 GSM range. Prefer enzyme products for organic spills, and verify HEPA-rated vacuums. Read safety data sheets, ventilate, and wear gloves and eye protection when using concentrated products.
- pH targeting: 6–8 for leather/plastics; higher-pH APC only for spot work on tough grime—then rinse.
- Microfiber: Edgeless, 300–400 GSM for interiors; use separate glass towels for streak-free windows.
- Brushes: Boar’s hair for delicate trim; nylon for fabrics; avoid metal on interior surfaces.
- Protectants: Non-greasy UV inhibitors to prevent fading and cracking from sunlight.
- Safety: Ventilate, don’t mix chemicals, and store products upright with clear labels.
For stain behavior across different materials, you can skim this overview on common stains and removal approaches from a cleaning specialist: common stains guide.
Case Studies from Unit #3 Drivers
From rideshare odor removal to winter salt extraction, Unit #3 drivers face unique cabin challenges. Applying the checklist with steam, extraction, and enzyme treatments removes embedded soils and neutralizes odors, restoring comfortable, hygienic interiors without damaging sensitive materials or electronics.
Rideshare refresh: A weekly Uber in Unit #3 needed quick odor recovery between long shifts. We combined enzyme pre-treat (about five minutes), overlapping extractor passes, and a brief ozone cycle in an empty cabin. The result was a neutral-smelling interior with sanitized touchpoints and cleared vents—ready for the weekend rush.
Winter salt comeback: After heavy slush, a white crust covered front carpets. A warm vinegar pre-spray (1:10) softened deposits; two extractor passes pulled out residue, and a final rinse left fibers clean. UV dressing on plastics prevented dullness from winter grime and sunlight.
Flood cleanup: Rear footwells soaked after a door seal issue. Immediate extraction within 12 hours minimized odor. We followed with enzyme treatment and airflow, then verified dryness before reinstalling mats. Acting fast prevented mildew and saved the underlayment.
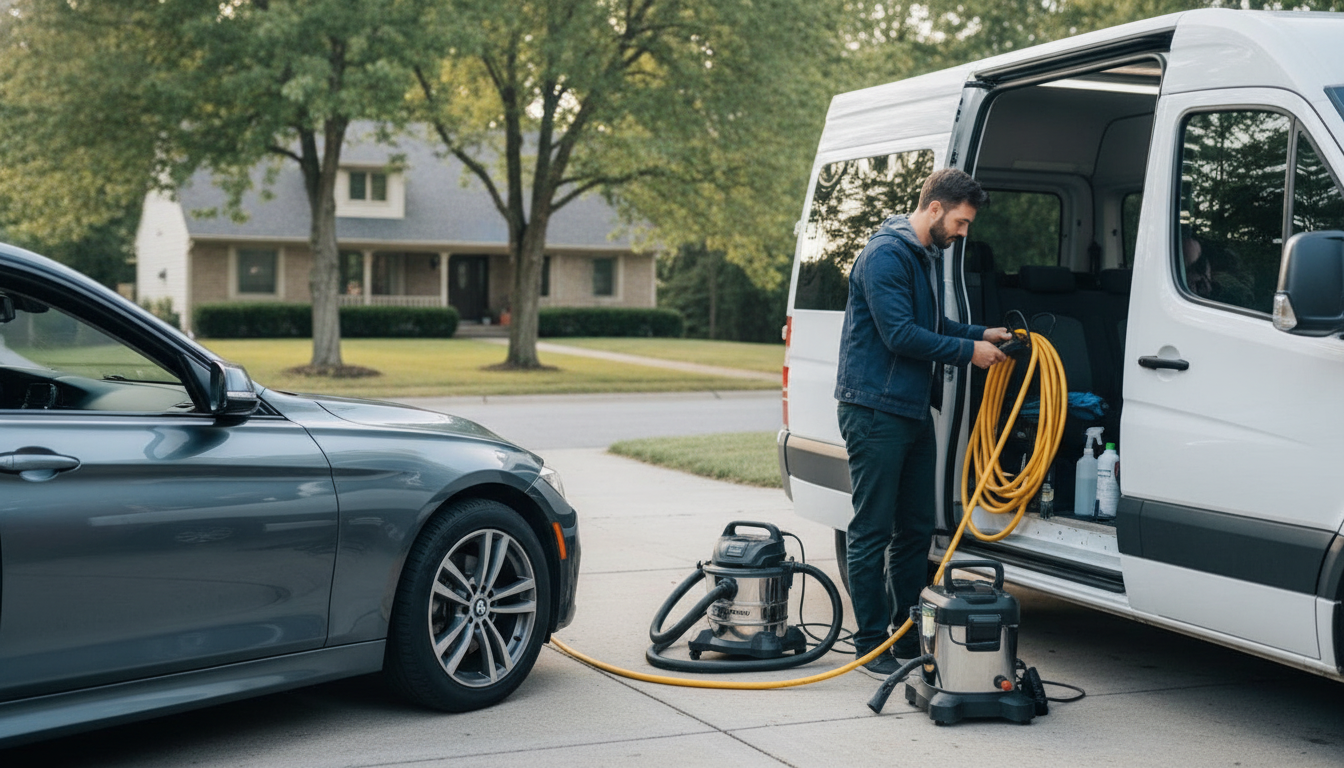
Need a mobile, no-hassle option? Our mobile car detailing at home or office brings power, water, and pro tools to your driveway so you can keep working while we deep clean.
Plan Your Deep Clean in Unit #3
Time deep cleans around weather and access. Choose shade, run fans, and schedule 2–4 hours when you can keep doors open. For mobile service, clear the driveway and provide 3–4 feet of door swing. Prioritize seasonal salt removal and odor control for local driving patterns.
Local considerations for Unit #3
- Traffic and errands near Mississauga Chinese Centre can track food residue and dust; schedule quick wipe-downs midweek.
- After snowy days at Westacres Park, pre-spray carpets to dissolve salt before it crystallizes and stains.
- For mobile detailing, leave space around your vehicle so our self-contained unit can run hoses and secure a safe work area.
For plastic trim that’s faded or scuffed from everyday use, see what exterior plastic restoration can fix and how it pairs with a clean, protected interior for a complete refresh.
Printable Interior Deep Clean Checklist
Use this condensed list for garage days. Move dry-to-wet, top-to-bottom, and let cleaners dwell before agitation and extraction. Keep a timer handy, color-code towels, and finish with glass and UV protection. Air-dry several hours with windows cracked for best results.
- Declutter cabin; remove mats
- Blow/brush cracks and vents
- Full vacuum (crevices first)
- Spot-test chemicals
- Pre-treat stains (3–5 min)
- Agitate and extract fabrics
- Clean and condition leather
- Wipe and protect plastics
- Sanitize high-touch areas
- Clean interior glass last
- Deodorize; then ventilate
FAQ: Interior Car Deep Cleaning
Most interiors benefit from a deep clean every 3–6 months, with quick monthly touch-ups. Extract fabrics after messy spills, sanitize touchpoints weekly, and replace cabin filters on schedule. Always test cleaners, keep moisture low on headliners, and ventilate through the drying phase.
How often should I deep clean my car interior?
Every 3–6 months for most drivers, plus immediate treatment after spills. Rideshare or family vehicles may need quarterly extractions and weekly sanitizing of high-touch areas.
Is steam or extraction better for seats?
Use extraction for heavy soil in cloth seats and carpets. Steam is great for plastics, crevices, and light fabric refreshes with minimal water. Many pros combine both in one service.
How do I remove winter salt stains?
Pre-spray a warm 1:10 vinegar-water mix to dissolve salt, agitate gently, then extract with fresh water. Repeat if residue wicks back. Dry with airflow for several hours to neutralize odors.
Can I use household cleaners inside my car?
Avoid harsh products like ammonia on tint and high-pH degreasers on leather or screens. Choose automotive, pH-appropriate cleaners and always spot-test in a hidden area first.
How long should interiors dry after extraction?
Plan 4–6 hours with windows slightly open and fans moving air. In humid weather, extend dry time or use a dehumidifier to prevent musty odors before reinstalling floor mats.
Conclusion and Next Steps
Follow a consistent interior deep clean routine to protect health, comfort, and value. Use HEPA vacuuming, proper dwell and agitation, fabric extraction, and UV-safe protection. For fast, guaranteed results, schedule Prime Auto Wash’s mobile or in-shop interior detailing in Unit #3.
- Use this interior car cleaning deep clean checklist every 3–6 months.
- Prioritize spills and odors immediately to prevent wicking and set-in smells.
- Document before/after photos and cabin filter changes to track upkeep.
- Lean on pros for extraction, ozone, pet hair removal, and sensitive materials.
Ready for a professional reset? Our certified detailers service homes and offices across Mississauga and the GTA. Book mobile or in-shop and we’ll bring the power, water, and pro tools to you.