Exterior plastic restoration is the professional process of reviving faded, chalky, or discolored exterior trim so it looks deep, dark, and uniform again. It fixes UV oxidation, stains, and light scuffs on plastics like bumpers and mirror caps, and helps repel water and dirt. In Unit #3, Mississauga, it’s a smart add-on to exterior detailing.
By Prime Auto Wash • Last updated: 2026-06-26
Start Here: Quick Overview and Table of Contents
Exterior plastic restoration revives black or gray trim by removing oxidation, deep-cleaning pores, and applying a restoring protectant or coating. This guide explains what it fixes, where it applies, how the process works, and how to keep results lasting longer in the GTA’s sun, rain, and winter salt.
Use this section as your roadmap. If you only scan one part, read the bullets below for the big picture, then jump to what you need.
- What it is, what it fixes, and where it works best
- Step-by-step process Prime Auto Wash follows on mobile and in-shop jobs
- Methods compared (dressings vs. dyes vs. coatings vs. replacement)
- Best practices for long-lasting, even-looking trim
- How it pairs with paint correction, ceramic coating, and PPF
- What Is Exterior Plastic Restoration?
- Why Exterior Plastic Restoration Matters
- What Does Exterior Plastic Restoration Fix?
- How Exterior Plastic Restoration Works (Step-by-Step)
- Methods and Products Compared
- Best Practices for Long-Lasting Results
- Tools and Resources
- Where It Fits with Other Services
- Case Studies and Examples
- FAQ
- Conclusion
- Related Topics and Next Steps
What Is Exterior Plastic Restoration?
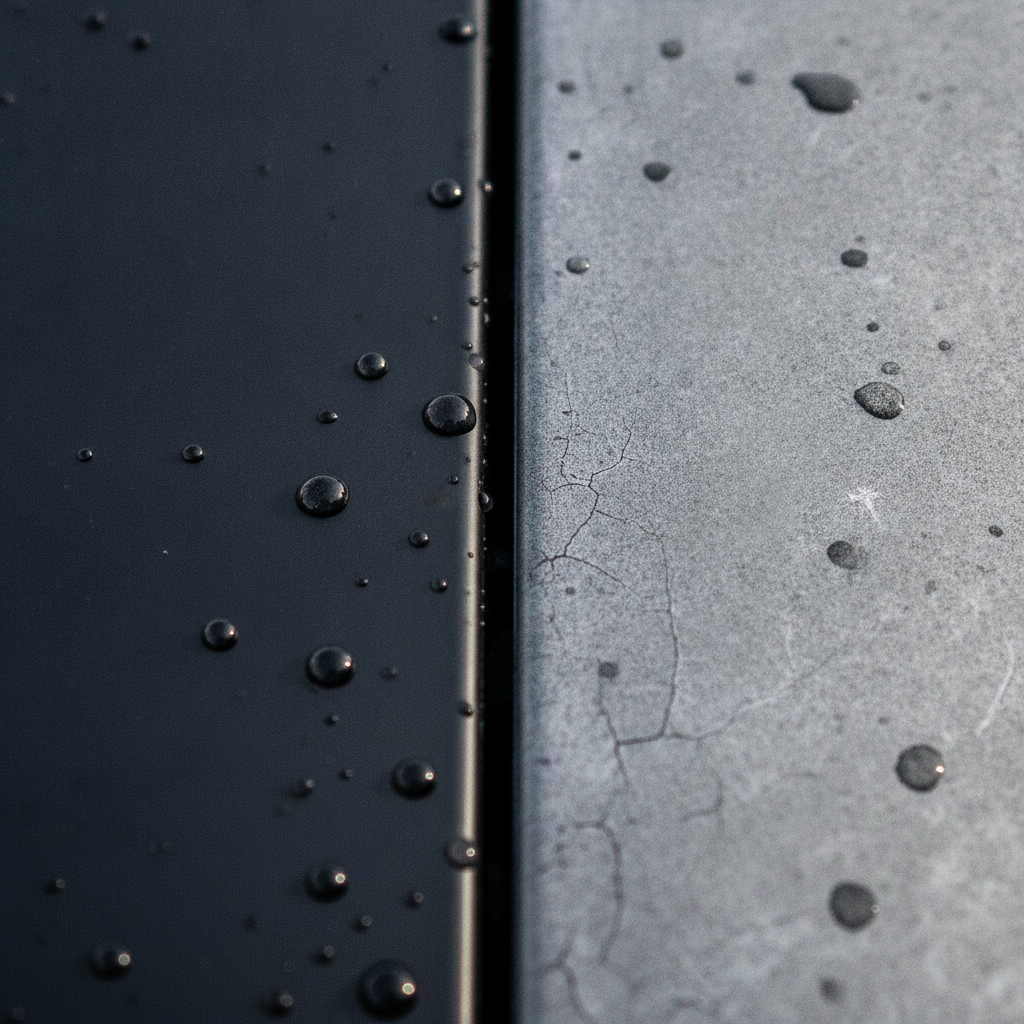
Exterior plastic restoration is a detailing service that reverses fading and chalking on textured plastic trim by deep-cleaning, decontaminating, and re-darkening the surface. A professional applies specialized restorers, dyes, or coatings to bring back uniform color and add UV protection for months or years.
On most modern vehicles, exterior trim is polypropylene or similar plastics that slowly oxidize. Sunlight, road film, detergents, and winter salt break down the surface, turning it gray and patchy. Restoration removes that oxidation layer and saturates the material with protection.
- Primary materials: Polypropylene (PP), TPO, ABS, and rubberized plastics on bumpers, mirror caps, cowl panels, roof rails, and window surrounds.
- Visible symptoms: Fading, uneven color, streaks, chalky residue, water not beading, and dry appearance after washing.
- Expected improvement: In our experience, properly restored trim looks 30–50% darker immediately and shows clear water beading after curing.
- Longevity: Dressings can last weeks to a few months; dedicated trim coatings often last 12–24 months when maintained.
Trim that is gouged, deeply scratched, or UV-brittle may need repair or replacement. But for most daily drivers, restoration brings a visible, camera-ready upgrade in under a day.
Why Exterior Plastic Restoration Matters
Restoring exterior plastic instantly sharpens your vehicle’s look, improves wash results, and supports resale value. Dark, uniform trim frames the paint, increases contrast, and reduces the “tired” look caused by gray, chalky plastics—especially noticeable on darker cars.
Here’s why it matters for drivers in and around Unit #3, Mississauga:
- First impressions: Dark, even trim makes every wash “pop.” Photos look better, and panel gaps appear tighter.
- Maintenance boost: Protected plastics shed water and grime faster, so routine washing feels easier and takes fewer passes.
- Resale signal: Buyers look for consistent appearance. Fresh-looking trim can tip decisions when similar cars compete.
- Winter defense: Protective chemistry helps buffer salt film. Clean trim is easier to rinse in freezing months.
If you’re prepping a vehicle for sale or lease return, combine trim restoration with paint decontamination and interior refresh. For perspective on value, see how a full detail affects trade-in in our resale value guide.
What Does Exterior Plastic Restoration Fix?
Exterior plastic restoration fixes surface-level oxidation, UV fading, chalking, light stains, and uneven blotches on textured trim. It re-darkens color, improves water beading, and hides micro-scuffs. It does not repair deep gouges, melted plastic, cracks, or warped pieces—those usually require replacement.
Think of restoration as cosmetic surgery for trim. It targets the oxidized top layer and reseals it for a more durable, dark finish.
Common problems it addresses
- UV oxidation and chalking: Gray, dusty-looking film that transfers to towels after washing.
- Uneven discoloration: Patchy black/gray areas where soaps, degreasers, or sun exposure weren’t even.
- Water-spot shadows: Mineral deposits that left dull halos on textured plastics.
- Light scuffs and rub marks: Shopping cart nicks or brush contacts that dulled high spots.
- Embedded grime: Dirt in pores around the cowl, wiper arms, and roof rails that normal washes miss.
Issues it usually cannot fully fix
- Deep cuts or gouges: Material removal requires repair or part replacement.
- Heat damage: Warped or shiny, melted patches from heat guns or exhaust proximity.
- Paint overspray buildup: Heavy overspray lodged in texture may need media removal or replacement.
- Aged dye mismatch: Extremely sun-baked trim may restore unevenly if different parts aged at different rates.
As a rule of thumb, if damage is deeper than a fingernail groove or the plastic is brittle to the touch, repair or replacement is safer than chemical restoration.
How Exterior Plastic Restoration Works (Step-by-Step)
Professionals deep-clean and decontaminate trim, remove oxidation, and then apply a restorer, dye, or trim coating that re-darkens and seals pores. Proper cure time and aftercare lock in results. The process typically takes 60–120 minutes depending on vehicle size and severity.
At Prime Auto Wash, our mobile unit brings power, water, and pro tools to your driveway or office—so you get shop-level results on your schedule. Here’s the workflow we use in Unit #3 and across the GTA:
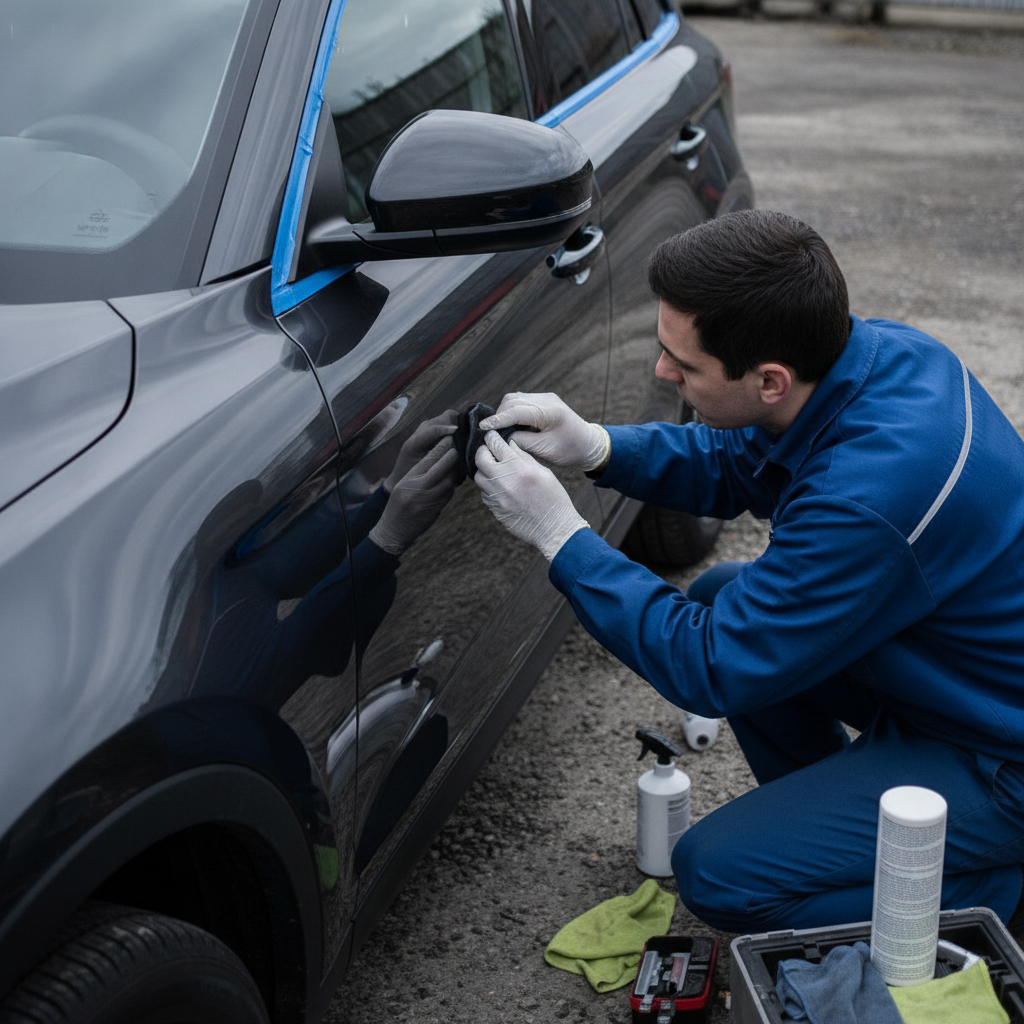
- Inspection and tape-off: Identify plastics (PP, TPO, rubber), test a small spot, and mask adjacent paint and glass.
- Degrease and wash: Use a plastic-safe cleaner and soft brushes to lift grime from textured pores.
- Decontaminate: Remove bonded minerals and old dressings; alcohol wipe-down preps a clean, squeak-free surface.
- Restore: Apply a trim restorer, dye, or ceramic-infused coating evenly with foam or suede applicators.
- Cure: Allow the product to level and set; typical dry-to-touch is 15–30 minutes, full cure up to 24 hours.
- Protect: Add a UV topcoat or hydrophobic layer if the system requires; note any water-contact restrictions for 12–24 hours.
In our experience, vehicles with heavy chalking need a second, lighter pass to even out absorption. Expect the finish to deepen over the first 24 hours as coatings cure.
Methods and Products Compared
You can re-darken trim with dressings, restore color with dyes, or lock in protection with dedicated trim coatings. Each method trades initial gloss, durability, and maintenance needs. Professionals choose based on material, severity, and your maintenance habits.
Use this comparison to choose the right approach for your car and driving patterns.
| Method | What it does | Durability | Look | Best for | Limitations |
|---|---|---|---|---|---|
| Water-based dressing | Quick re-darkening; adds sheen | Weeks to 2–3 months | Satin to glossy | Quick refreshes, frequent washers | Rinses quicker in rain and washes |
| Solvent dye/restorer | Re-pigments faded plastic | 6–12+ months | Rich, factory-like black | Heavily oxidized trim | Needs careful masking; can stain paint |
| Trim coating (ceramic/siloxane) | Seals pores, UV shields | 12–24+ months | Satin, dark, hydrophobic | Daily drivers, harsh climates | Requires clean prep; cure time |
| Heat re-flow (controlled) | Momentarily re-levels top layer | Variable | Darkens, may turn glossy | Spot fixes on certain plastics | Risk of warping or shine; pro-only |
| Part replacement | New, perfect finish | Long-term | Factory new | Broken or cracked parts | Time and sourcing; recalibration possible |
If your paint already has paint protection film (PPF), a trim coating still helps on exposed plastics. For background on pairing protective layers, see this ceramic-over-PPF overview and this short PPF benefits explainer.
Best Practices for Long-Lasting Results
The longest-lasting restorations start with meticulous cleaning, even application, and gentle aftercare. Wash pH-neutral, avoid harsh degreasers, and top with a UV-safe protectant. Reapply light maintenance coats every 3–6 months to keep color uniform year-round.
From our certified team’s playbook:
- Prep is everything: Two slow cleaning passes lift years of film. A rushed wash leaves patchy absorption.
- Less is more: Thin, even coats prevent streaking and high-spot shine. Wipe level after 1–2 minutes.
- Avoid strong APCs post-cure: Stick to pH-neutral shampoos so you don’t strip protection early.
- Dry thoroughly: Water trapped in texture can ghost the finish. Use air to chase water from seams.
- Shade and time: Work cool panels. Plan 12–24 hours before heavy rain or automatic washes.
- Top-up routine: A light maintenance layer every season keeps saturation even, especially after winter.
Sunlight is relentless in summer. Pair trim care with paint sun strategies from our paint sun-protection guide to reduce overall UV load on the vehicle.
Tools and Resources
A successful trim restoration uses plastic-safe cleaners, soft brushes, isopropyl prep, high-quality trim restorer or coating, applicators, and masking. Professional setups add steam, compressed air, and controlled lighting for consistency and speed.
Essential kit we bring to you
- Self-contained mobile unit: Onboard power and water for driveway or office service—no hookups needed.
- Steam cleaner and pressure washer: Dislodge embedded grime without tearing texture.
- Applicators and microfiber: Foam blocks, suede applicators, and lint-free towels for even leveling.
- Masking and lights: Crisp edges and bright inspection lights to catch high spots.
Prefer a controlled environment? Book our Mississauga shop for complex multi-service appointments like paint correction, ceramic coating, and trim restoration together on the same day. Start with our Interior & Exterior Detailing Mississauga page.
Where It Fits with Other Services
Exterior plastic restoration is the finishing touch that frames great paint and glass. Do it after decontamination and correction, and protect it with coatings. Inside, pair it with interior detailing for a front-to-back refresh.
Here’s how we typically sequence it for Prime Auto Wash clients:
- Decon first: Clay and iron removal on paint; clean plastics so everything is residue-free.
- Correct paint: Address swirls and haze before trim work, so polishing dust doesn’t stick to fresh plastic.
- Restore trim: Re-darken and seal plastics; allow recommended cure time.
- Protect paint: Add ceramic coating or PPF if desired; keep edges clean around restored plastics.
For interior results that match the exterior, explore our Full Interior Detailing service and learn why interior detailing matters for daily driving. Fighting minerals? Our tips on removing water spots can save you hours of trial and error.
Case Studies and Examples
Real-world trims respond differently based on age, exposure, and material. These short scenarios show typical results, timelines, and when we recommend coatings versus quick refreshes for GTA drivers.
Daily driver with heavy UV fade
- Vehicle: 8-year-old crossover parked outdoors.
- Symptoms: Chalky cowl, gray mirror caps, streaky bumper inserts.
- Approach: Two cleaning passes, dye-based restorer on cowl, trim coating elsewhere.
- Result: Visibly darker trim; uniform beading after 24 hours; seasonal top-up advised.
Winter commuter with salt staining
- Vehicle: Sedan commuting during GTA winters.
- Symptoms: White salt film embedded in porous bumper texture.
- Approach: Steam-assisted cleaning, mineral remover, ceramic-infused trim coating.
- Result: Staining reduced; hydrophobic layer resists re-embedding through winter.
Rideshare vehicle prep
- Vehicle: Uber/Lyft hatchback with frequent washes.
- Symptoms: Dull, streaky plastics from strong detergents.
- Approach: Gentle cleaners, water-based dressing for quick refresh between clientele-heavy weeks.
- Result: Immediate “like-new” look; weekly top-ups keep photos sharp on listings.
New car enhancement
- Vehicle: Brand-new SUV delivered with slightly uneven trim tone.
- Approach: Light prep and a dedicated trim coating so plastics age evenly from day one.
- Result: Consistent satin finish, strong beading; easy maintenance after rain.
Local considerations for Unit #3
- Weekend detailing near Unit #3 often means outdoor work. If you’re out by the Mississauga Chinese Centre, early morning shade helps coatings level cleanly.
- Spring pollen and summer UV can spike fast. Schedule trim restoration before long road trips and after the first deep spring wash.
- Parking near Westacres Park? Rinse plastics after storms—tree debris and splashback can cake into textured pores.
Frequently Asked Questions (FAQ)
These quick answers cover what exterior plastic restoration can and can’t fix, how long it lasts, and how to care for it. Each reply is designed for fast scanning and voice assistants.
What parts of my car benefit most from plastic restoration?
Textured exterior plastics like bumpers, mirror caps, cowl panels, windshield wiper arms, roof rails, and window surrounds show the biggest improvement. These areas collect UV, salt, and detergents, so re-darkening and sealing them delivers the most visible “like-new” contrast around your paint.
How long will restored trim stay dark?
Longevity depends on method and maintenance. Water-based dressings can last weeks to a few months. Dye-based restorers often hold 6–12 months. Dedicated trim coatings usually protect 12–24 months with gentle washes and periodic top-ups, especially if the car lives outside.
Will plastic restoration fix deep scratches or cracks?
No. Restoration targets surface oxidation and light scuffs. Deep gouges, melting, cracking, or warped parts usually require repair or replacement. A quick inspection can confirm whether a dye or coating will sufficiently disguise damage or if a new part is the better route.
Can I apply ceramic coating over PPF and restored plastics?
Yes. Many systems allow ceramic coatings over paint protection film (PPF) and on exterior plastics, provided surfaces are properly prepped. Always follow the coating maker’s cure times and avoid washing for 12–24 hours so the chemistry bonds correctly to both film and trim.
What maintenance keeps the restored look the longest?
Wash with a pH-neutral shampoo, dry thoroughly, and avoid harsh all-purpose cleaners on trim. Add a light maintenance coat every 3–6 months, especially after winter. If you machine polish paint, re-tape edges so compound dust doesn’t stick to freshly restored plastics.
Conclusion
Exterior plastic restoration fixes oxidation, fading, and light staining on textured trim, returning a factory-like, dark finish. When paired with careful washing and seasonal top-ups, results can hold for a year or more, especially with dedicated trim coatings.
Here’s the bottom line for drivers around Unit #3: restored trim makes every wash look better, reduces cleaning time, and signals care to future buyers. Done alongside paint correction and protection, it’s a small step with an outsized visual impact.
Key takeaways
- Restoration targets surface oxidation and uneven color—not structural damage.
- Proper prep and thin, even application are the difference between streaks and a factory look.
- Trim coatings typically outlast dressings and hold color through winter better.
- Routine, gentle washing preserves hydrophobic behavior and dark tone.
Want pro results without the hassle? Book mobile or in-shop service with our certified team. Start here: Interior & Exterior Detailing in Mississauga.
Related Topics and Next Steps
Exterior plastic restoration pairs best with paint decontamination, correction, and protection. If you’re building a car care plan, schedule trim work after correction and before coatings, and align interior detailing the same week for a holistic refresh.
Curious about swirl origins and prevention? This short overview of swirl marks explains common causes. If you’re planning advanced protection later, skim our resources on paint sun care and water spot removal on the Prime Auto Wash blog for a complete exterior roadmap.